 |
 |
 |
 |
 |
 |
 |
 |
The Bryan Talbot Textgallery: number 3:
the Heart of Empire images
This is a text only guide to the images on the site of Bryan's: I have created it so that there is more than one way to browse the images and you can choose whichever method suits you best. Also in the Textgallery series is Textgallery Six, Textgallery Five, Textgallery Four, Textgallery Two and Textgallery One; alternatively, there are the thumbnail galleries, and the best list of those are on the gallery guide page; and finally for those that just want to see the images with minimum hassle then there is a single page with a link to every image on the site in the image page navigator.
On this page, there are links to the images from Heart of Empire thumbnail gallery one, thumbnail gallery two, thumbnail gallery three, and thumbnail gallery four. Bryan suggested that I add to the site a list of all of the complete strips that are on it, and the strip listing is the result.
Heart of Empire Thumbnail Gallery One |
||
| Issue One Cover | ||
| In a world held in the iron grip of a totalitarian empire, the dying Pope, guided by a vision from God, sends his top assassin to the Imperial Palace with a dire mission -- but the countdown to total destruction has already begun! Meanwhile, the Princess Victoria embarks on a quest that will turn her world upside down. The long-awaited stand-alone sequel to The Adventures of Luther Arkwright is finally here. Bryan Talbot has created an amazingly complex, yet accessible universe filled with action, adventure, romance, heroism, and betrayal. An epic tale that builds inexorably to a roller-coaster ride that will have you hanging on every word and every image! | ||
| Issue Two Cover | ||
| In a city to rival Gotham, the intrigue and tension begin to build as we enter the Imperial Palace and meet the Empress' public and private personas; one an Elizabethan fever-dream, the other a walking nightmare! A labor of love by Eisner award-winning writer-artist Bryan Talbot, sumptuously colored by Angus McKie (Martha Washington). | ||
| Issue Three Cover | ||
| From the splendors of the Imperial palace and the new St. Paul's Cathedral to the dangerous streets of Alsatia, the cracks in Queen Anne's rule are beginning to show. The seeds of rebellion are taking root, a Papal assassin stalks the royal court, and Princess Victoria is discovering the extent of her own, possibly uncontrollable, psychic powers. | ||
| Issue Four Cover | ||
| Luther Arkwright's daughter, Princess Victoria, comes into her own when she single-handedly thwarts an assassination attempt on activist Gabriel Shelley. Guns, knives, and hand grenades become toys in her hands, then she becomes putty in Shelley's. Meanwhile, papal assassin Father Barberini continues to stalk Victoria's mother, the Queen. | ||
| Issue Five Cover | ||
| It's the eve of destruction and London goes wild as Victoria descends into a terrifying nightmare. From sunrise over Alsatia to the living hell of Bedlam and beyond, from betrayal and plots of violent revolution to hot sex in the Queen's bedchamber, this is probably the best single issue of any comic you'll buy this year. Featuring a three-page strip by Neil Gaiman and Dave McKean. | ||
| Issue Six Cover | ||
| An issue full of revelations. American reporter Hiram J. Kowolsky discovers his assistant Angela is much more than she seems. Old Harry Fairfax finds that he still has some of his old spark (but keep him away from open flame!). The extent of the plot against the royal family is revealed. And Princess Victoria receives the shock of her life. | ||
| Issue Seven Cover | ||
| As the countdown to cataclysm nears its conclusion the pace is heating up. The assassin Barbarian shears a bloody path to the Empress's private orgy. The Levellers enter Britannia Square to face the Militia like lambs to the slaughter. We witness disaster at ZeroZero, the death of four major characters, and at last face the true Heart of Darkness. All this plus the Rat Woman, Kenny Baker, and Fairfax's finest fart yet. | ||
| Issue Eight Cover | ||
| All hell breaks out as we hurtle towards the finale; the massacre begins in Britannia Square! Panic at ZeroZero as WOTAN screws up! The Rat's Castle Squad is caught in a withering hail of bullets! An inexorable countdown to total destruction! And Victoria finally confronts the ghastly truth, the source of all her ills and the true Heart of Empire. Let the battle commence! | ||
| Issue Nine Cover | ||
| Teetering on the brink of the psychic equivalent of the Big Bang, the bloody slaughter of the pro-democracy demonstrators in Britannia Square continues unabated. Rose Wylde prepares to sacrifice herself as the Princess Victoria finally faces the true Heart of Empire -the all-powerful center of evil. In this final chapter we witness the last of England and beyond. The senses-staggering conclusion to the critically acclaimed retro-SF adventure series. | ||
Heart of Empire Thumbnail Gallery Two |
||
| The best way to deal with racists! | ||
| Hiram Kowolsky shows the best way to deal with racists - twat them in the face! | ||
| Heart of Empire: new page! (1) | ||
| A new page released for publication from the forthcoming Heart of Empire, the sequel to the adventures of Luther Arkwright. (Also check out the Information Bulletin on Heart of Empire, and the image of the frontispiece for it, which is in Gallery 3) | ||
| Heart of Empire: new page! (2) | ||
| The second page released by Bryan for publication from the new Heart of Empire: remember - you saw it here first! | ||
| Heart of Empire: new page (3) | ||
| The third page released by Bryan for publication from the new Heart of Empire. | ||
| Heart of Empire: new page (4) | ||
| The fourth page released by Bryan for publication from the new Heart of Empire. | ||
| New page from Issue Four! | ||
| This is a new page from issue four that Bryan has just sent to me for inclusion on the site... it is page 103 of the whole story. | ||
| Bryan's alternative photo | ||
| This is a "photo" of Bryan from Issue One
of Heart of Empire: it was specially commissioned to accompany the
alternative biography of him. The caption that accompanied it in the
comic was: |
||
| The website address, as printed in Heart of Empire issue one | ||
| This is how the website address was published in issue one: I must admit, that it is pure vanity on my part to put this up, but hey! - it's my website! | ||
| Bryan's alternative portrait | ||
|
This is an alternative portrait of Bryan, to accompany the alternative biography in the first issue of Heart of Empire: see also the alternative photo. The caption that will accompany it in the published
comic will be: |
||
| Page 2 of issue 1 | ||
| Page 2 of issue 1 | ||
| Page 3 of issue 1 | ||
| Page 3 of issue 1 | ||
| Page 4 of issue 1 | ||
| Page 4 of issue 1 | ||
| Page nine - as it should look! | ||
|
Page 9 as it should look..... Bryan asked me to put this on the site in order to try and remedy the cock-up made by the printers... |
||
Heart of Empire Thumbnail Gallery Three |
||
| Panel 1 of page 106 of issue 4 - static | ||
| Here is the first panel of this page in very first rough draft form, mid quality black and white form, and final, finished version in full colour. | ||
| Animation of panel 1 of page 106 | ||
| I tried this as an experiment, loading all of the stages of the creation of panel 1 of page 106 into a gif animation, and the result is amazing! (but owes rather more to Bryan's artistic skills than to my Photoshop ones!) | ||
| Panel 2 of page 106 of issue 4 - static | ||
| Here is the second panel from page 106 in all three stages of creation - with me sitting there in the background, on the far right.... | ||
| Animation of panel 2 of page 106 | ||
| Here are the three stages of panel 2 of page 106 in another single animation. This is also the first frame of the comic that actually has me as a background character in it.... that's me sitting on the chairs behind Gabriel on the far right of the row. | ||
| Panel 3 of page 106 | ||
| Here is panel 3 of page 106 in all of its stages of production. Because this image is so big, I have created the page in two different versions: you can either see it all in one place - which is admittedly a hefty download, - or you can see each stage separately: the first rough draft, the midway through version, and then the final coloured, printed version. Clicking on the thumbnail will take you to the all-in-one page. | ||
| Animation of panel 3 of page 106 | ||
|
Here's the animation of all three stages of creation of panel 3: it's a large file, but I hope you'll agree worth the download time. And I am a character in this one too... as a thank you Bryan drew me in as an anti-fascist, anti-Royalist, anti-racist revolutionary...... yes! |
||
| Page One in full colour | ||
| This is it: this is where it all starts.... here is page 1 of the whole thing in it's full colour form.... | ||
| Page One in first rough draft | ||
| This is it: this is where it all starts.... here is page 1 of the whole thing in it's first rough draft form.... | ||
| Page 79 of issue 3 in colour | ||
|
Here is another chance to see one of Bryan's pages from Heart of Empire in full colour version - and also in the first rough draft version (below) I feel incredibly proud to be able to show fans of Bryan's work this kind of thing - his work evolving on the page.... |
||
| Page 79 of issue 3 in rough rough draft | ||
| Page 79 in it's first rough draft version, on the way to becoming the masterpiece of the finished version above... | ||
| Page 15 of Issue One in rough version | ||
| This is Bryan's first rough draft of page 15 of issue 1. | ||
| Page 15 of Issue One in colour | ||
| This is page 15 of issue 1 in full glorious colour, put up here mainly to show the way that the page evolved as is went from first rough draft to this finished version. | ||
Heart of Empire Thumbnail Gallery Four |
||
| Panel 3 of page 114 (Chapter Four) in all three stages of production | ||
|
This is the latest in the series of panels that I am able to show in all three stages of production: two panels from page 117 in issue four. Of course, it is a pure coincidence, beneath notice that this is also another panel that has got me in it..... Because this is a relatively large image I have created a page each for the first rough version, the midway through version, and the final completed version. Clicking on the thumbnail will take you to the first rough draft, and from there you can navigate between all three. |
||
| Animation of panel 3 of page 114 Chapter Four | ||
| This is an animation of panel 3 of page 117, chapter 4: it's an excellent way to see Bryan's creative process all the way through from first rough version to final coloured version. It's a larger file so be prepared for a slight wait - but I think it's definitely worth it. | ||
Heart of Empire Thumbnail Gallery Five |
||
| Back cover of issue one | ||
| This is the back cover of issue one. This image also exists as wallpaper in 800 by 600 and 1024 by 768 formats. | ||
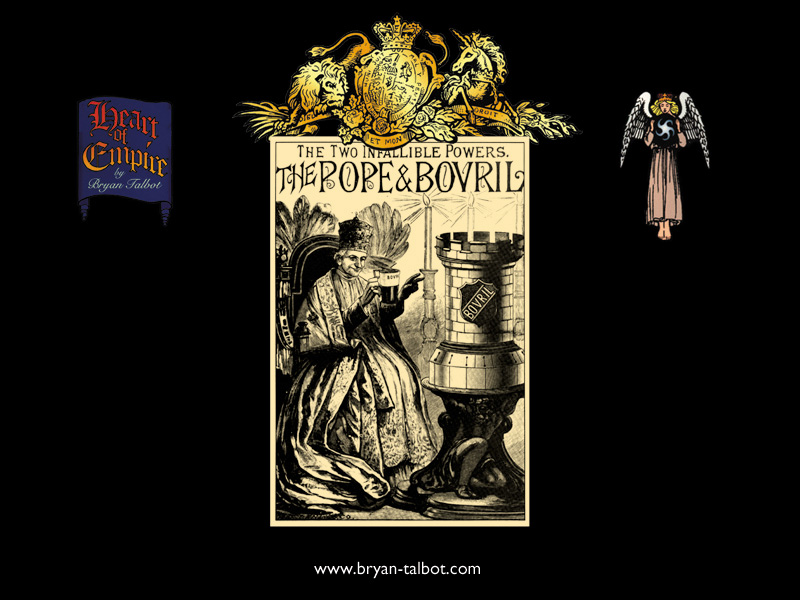
| Frontispeice wallpaper | ||
| The Heart of Empire frontispiece as wallpaper, at 800 by 600 and 1024 by 768. | ||
| Back cover of issue two | ||
| The back cover of issue two. | ||
| Back cover of issue three | ||
| The back cover of issue three. | ||
| Back cover of issue four | ||
| The back cover of issue four. | ||
| Back cover of issue five | ||
| The back cover of issue five. | ||
| Back cover of issue six | ||
| The back cover of issue six. | ||
| Back cover of issue seven | ||
| The back cover of issue seven. | ||
| Back cover of issue eight | ||
| The back cover of issue eight. | ||
| Back cover of issue nine | ||
| The back cover of issue nine. | ||
Thumbnail Gallery Seven |
||
| Luther flying | ||
|
This is Luther telekinetically propelling himself from the Cathedral across the street to where the Puritan Cabinet are meeting in order to assassinate them. All of them.
|
||
|
Home
| Galleries
| Biographies
| Emporium
| News
| What's
new
Articles | Links | Site index | FAQ | email | Bulletin board |